In-the-hoop projects are very similar in many
ways to appliqué designs done in the hoop. Both have a placement stitching
line, a tack down line, followed normally by detailing and a satin stitch
outline. Depending upon the design, there may be only one set of placement and
tack down lines or there may be a few sets of them—but they are similar. From
my experience working in a store, I’ve seen many people avoid appliqué and/or
in-the-hoop projects simply because they think they might be too difficult for
them. So let’s demystify some of those steps.
First, tutorials are included with in-the-hoop
projects giving you step-by-step instructions by most if not all digitizers. If
you take it one step at a time you’d be surprised how simple and fun they can
be. The added benefit of an in-the-hoop project is that once it’s out of the
hoop, generally it’s all done. It’s a quick way to get a feeling of
accomplishment pulling a finished project out of the hoop--great for those of
you who don’t have a lot of time to sew.
In-the-hoop projects start off with a
“placement” stitch. It really doesn’t matter what color of thread you use for
the placement stitch. The placement stitch won’t show in the completed project
because it will be covered by other stitches. It’s just a stitch to give you a
visual of where to place the material (the instructions will tell you what type
of material to place down, i.e., fabric, batting, etc.). The machine will
automatically stop allowing you time to put your material down just like it
stops for any other color change. That’s why the digitizer made this placement
line a different color—so the machine will know when to stop.
After placing the material over the placement
line, the second step is normally a “tack down” stitch. The tack down stitch
will hold down that material in place so it doesn’t shift. After the tack down
is complete, you’ll want to take the hoop out of the machine but not the
material out of the hoop and trim very closely to the stitching. (Again, the
color of the thread doesn’t matter as the color change is there so that the
machine would know when to stop so you can trim.) Once you’ve trimmed the
material, you’ll place the hoop back into the machine to complete the design.
More often than not, you’ll be given instructions at some point to wind a bobbin
with matching thread for the top as well as bobbin for a satin stitch which can
be seen on both sides.
Depending upon the in-the-hoop project, I like
to use a wash away stabilizer. When the design is complete I can either throw
it in the wash or use a stencil cutter to melt away the stabilizer giving the
satin stitch edge a clean and tidy finish. Tear away stabilizers have a
tendency to leave little pokies of stabilizer bits sticking out from the satin
stitching when pulled away. (Tip: If this has happened to you, use a
“cover up” pen matching the color you used on the satin stitching and color the
pokies.)
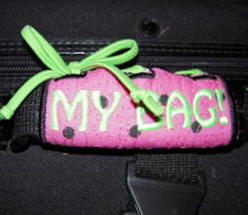
I’ve included a free sample Luggage Spotter
project for you
to try your hand at an in-the-hoop project. It only takes 2, 6” pieces of
fabric, 1, 6” piece of batting, embroidery thread, and an ¼” wide elastic head
band (or shoe string) to complete the project. Complete step-by-step
instructions with photos are included. Should you have any questions along the
way, just write me and I’ll try to get you past the hump.
Every in-the-hoop project will have some
similarities. Some will be more involved than others but they’ll all have a
placement line, tack down stitches, and then your final embroidery detailing.
Enjoy! Bonnie Welsh - Sew Inspired
by Bonnie - Professional Embroidery Designs/Software Tutorials |